> For the complete documentation index, see [llms.txt](https://docs.plenit.com/llms.txt). Markdown versions of documentation pages are available by appending `.md` to page URLs; this page is available as [Markdown](https://docs.plenit.com/docs-en/productos/servers-1/quickstart.md).
# Quick Start
Create your first DNS zone in Plenit, delegate the domain, and publish your first records in four steps.
The DNS service allows you to manage your company’s domains and your customers’ domains from the Plenit dashboard, alongside the rest of the services.
> #### 📘 What you'll achieve
>
> This guide walks you through the essential process: creating the zone, delegating the domain from your registrar, publishing the first records, and verifying that everything resolves correctly.
### Before you start
To follow this guide, you need:
* Access the administration panel at admin.plenit.com with DNS permissions.
* Have a registered domain. Plenit hosts and manages the domain’s DNS zone; the domain registration is kept with your usual registrar.
* Be able to access your registrar’s panel to change the domain’s nameservers.
### Step 1. Create the DNS zone
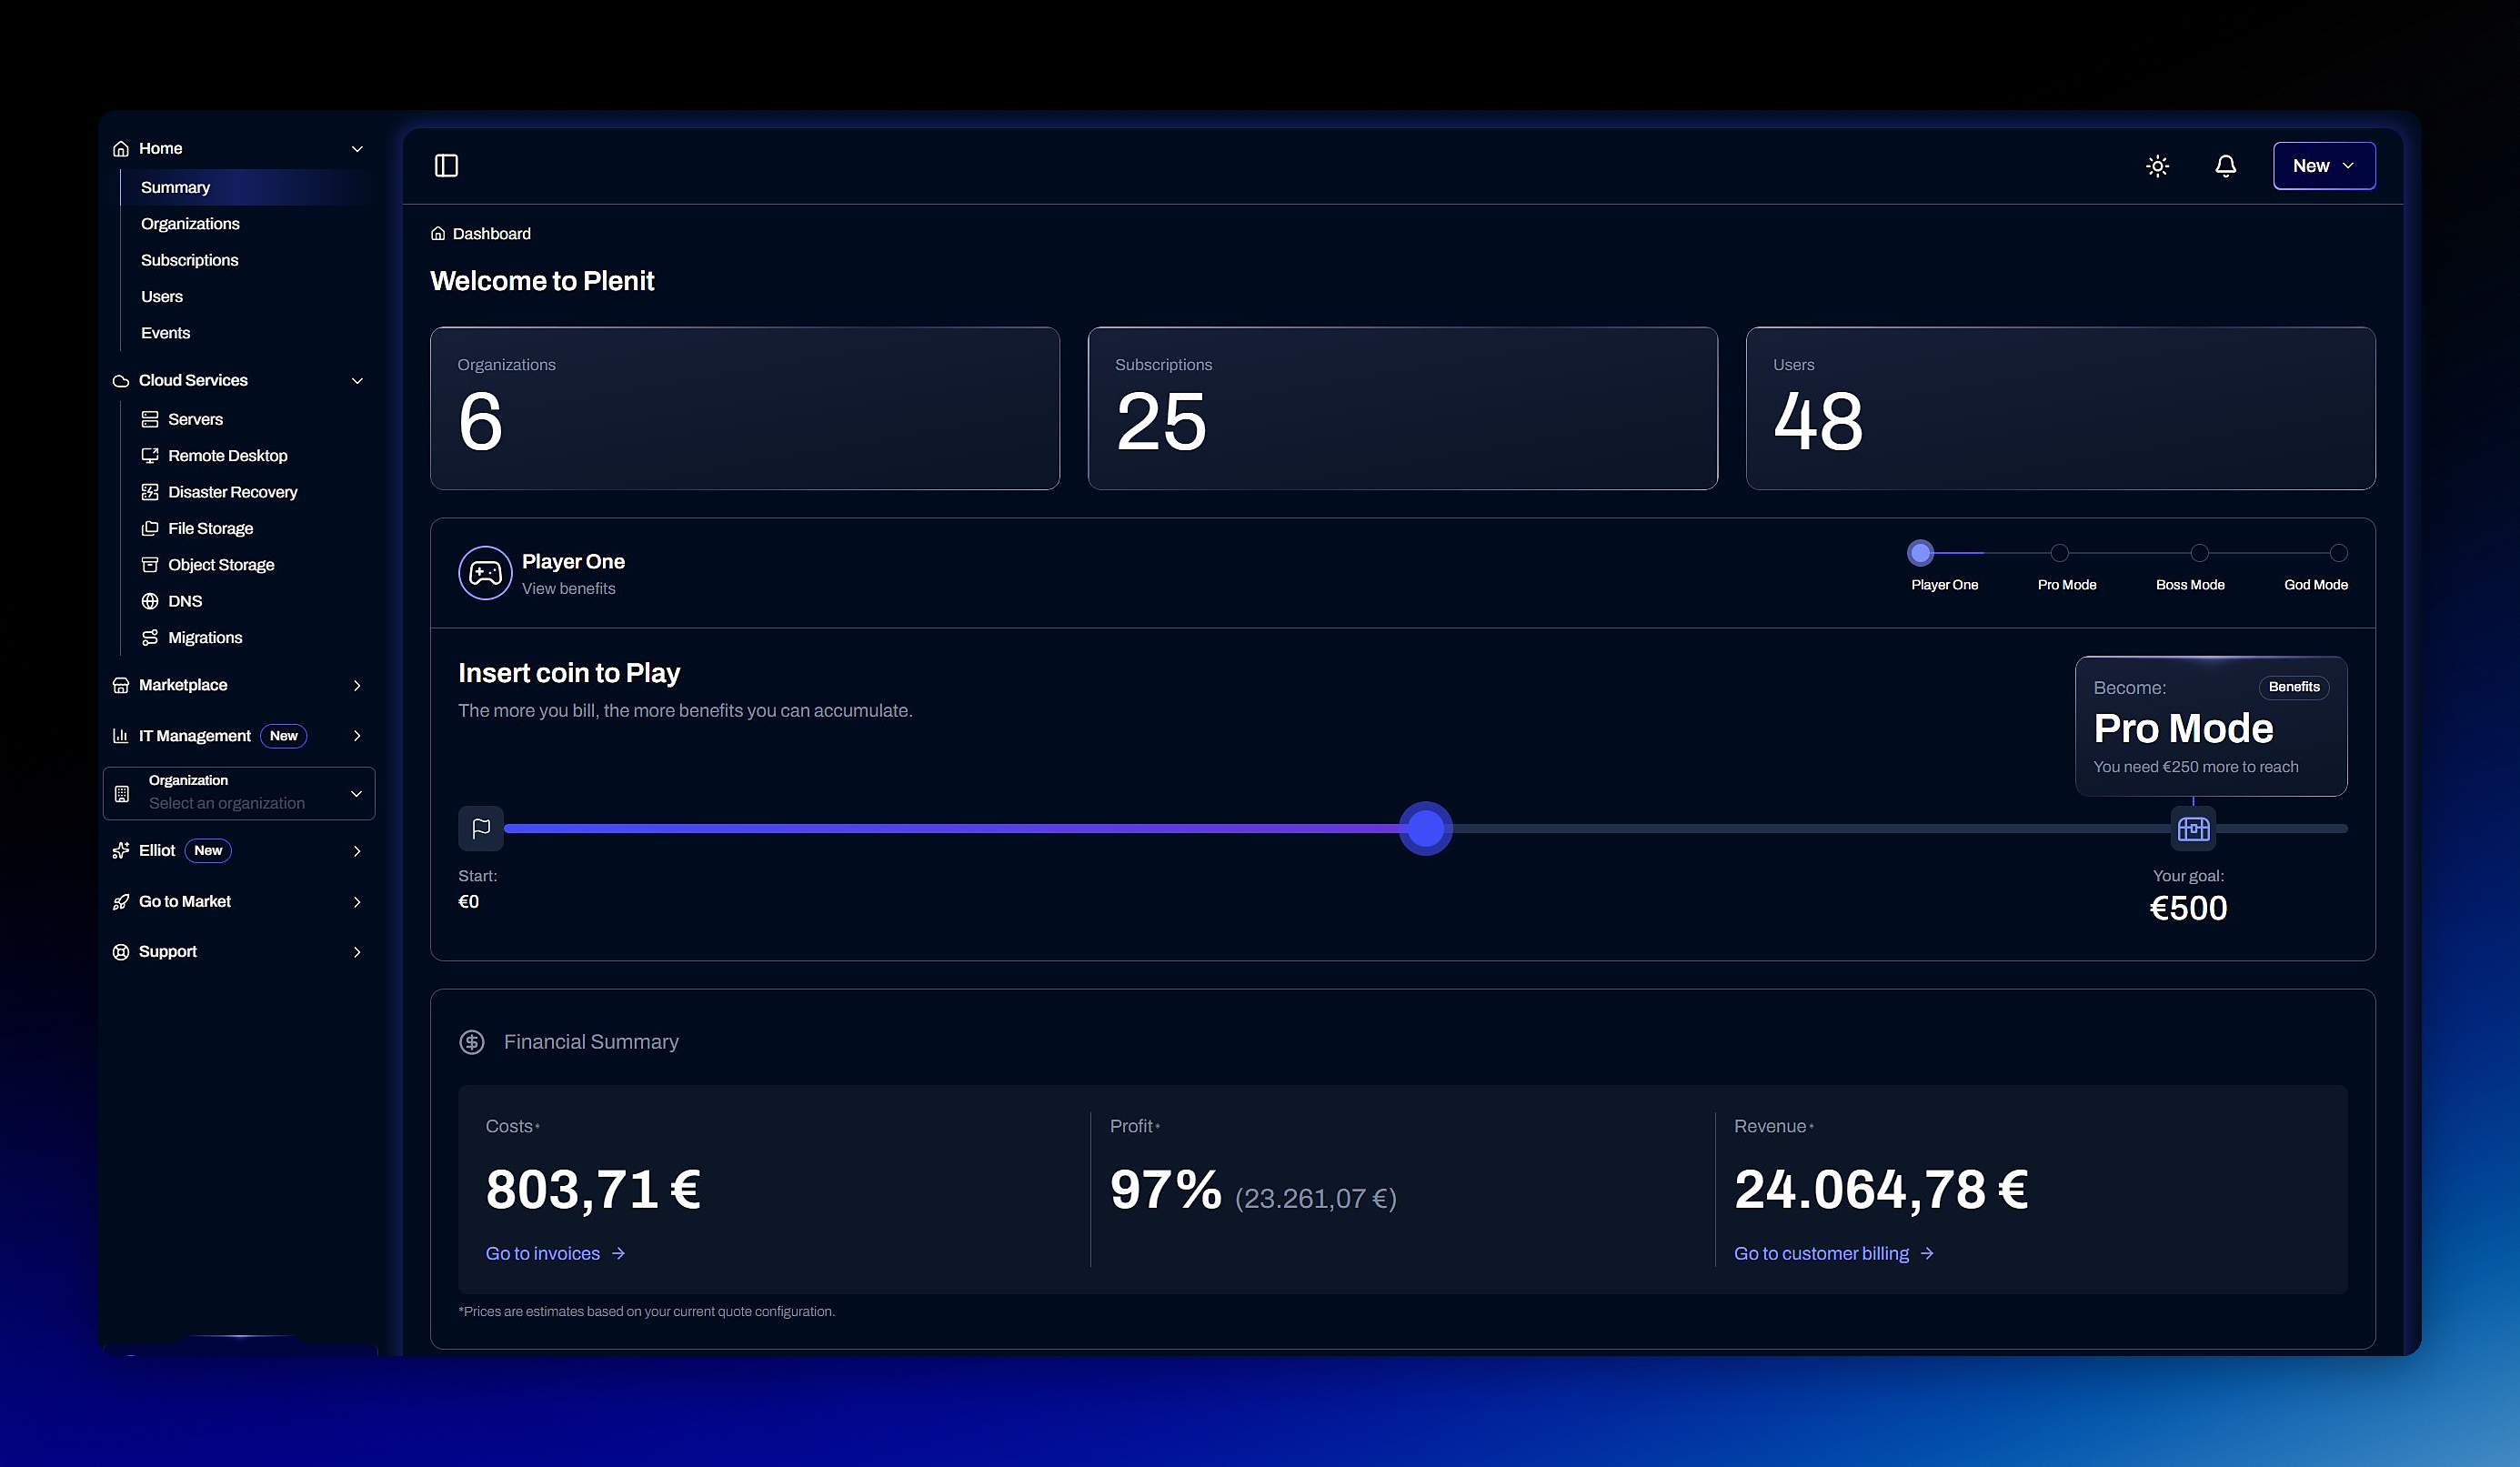
In the dashboard, go to **DNS** and click **New zone**. Enter the domain name (for example, yourdomain.com) and confirm.
The zone is created instantly with its system records (SOA and NS) and is ready to receive your records.
> 📘 **New zone or migration?**
>
> If the domain already has records published with another provider, create them in the Plenit zone **before** delegating, so there is no service interruption.
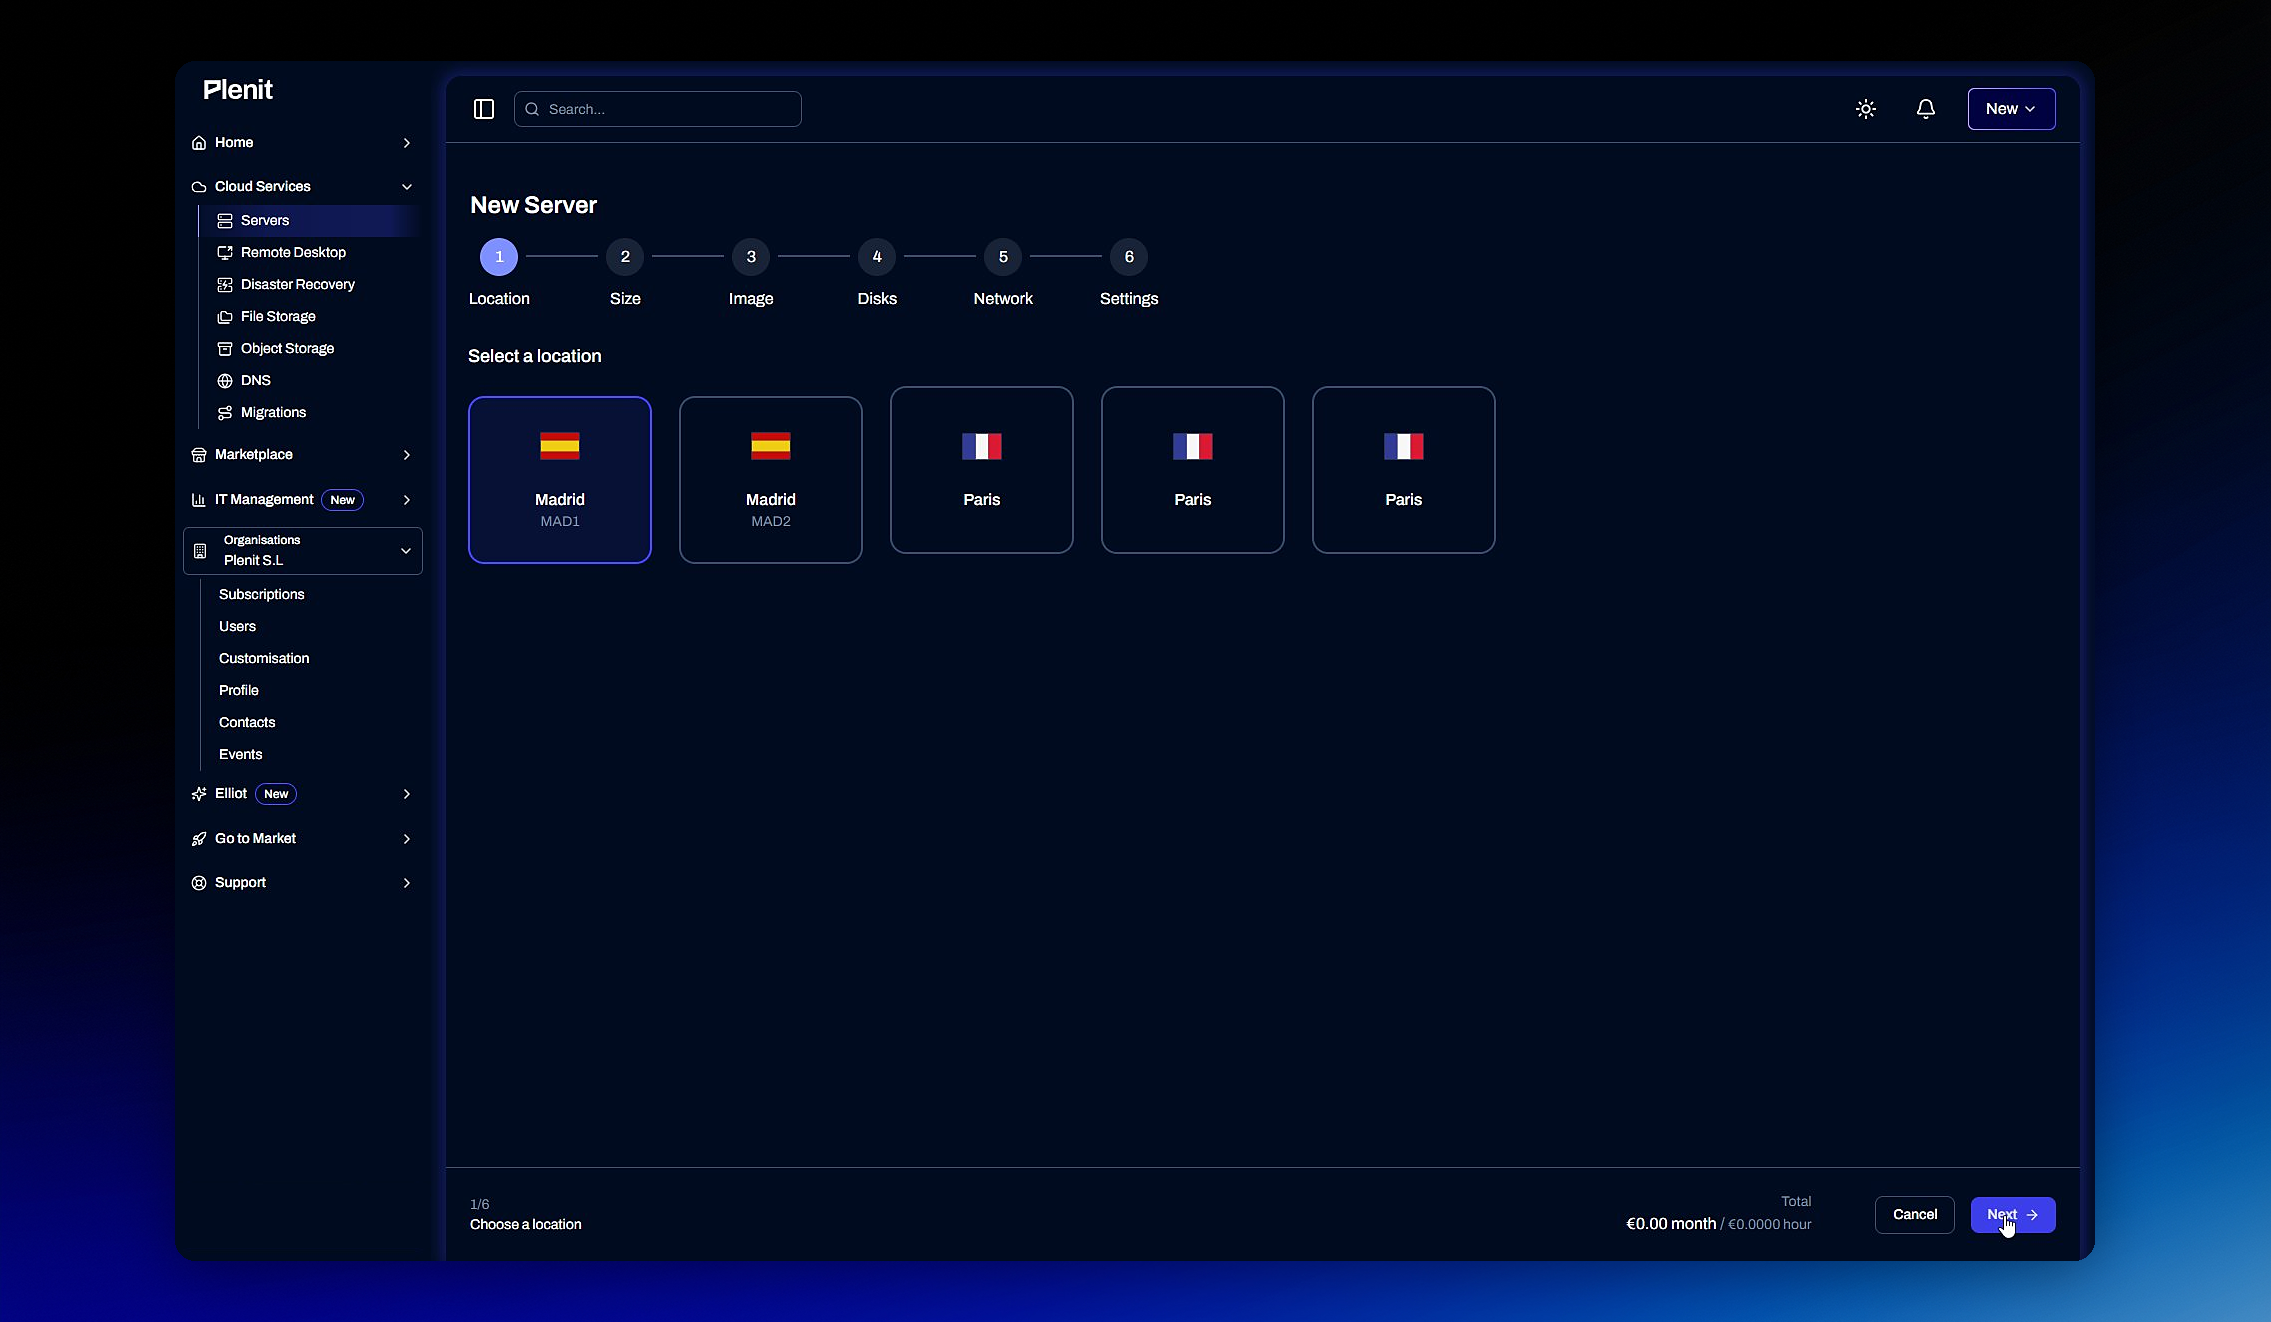
### 2. Choose the location
Start the wizard. The first step is the **location**: select the region where you want your server to be hosted. You have Madrid (EU-DEV1) and Paris (EU-DEV5), among others.
> 📘 Madrid or Paris?
>
> Choose the region closest to your users or to the rest of your infrastructure to reduce latency.
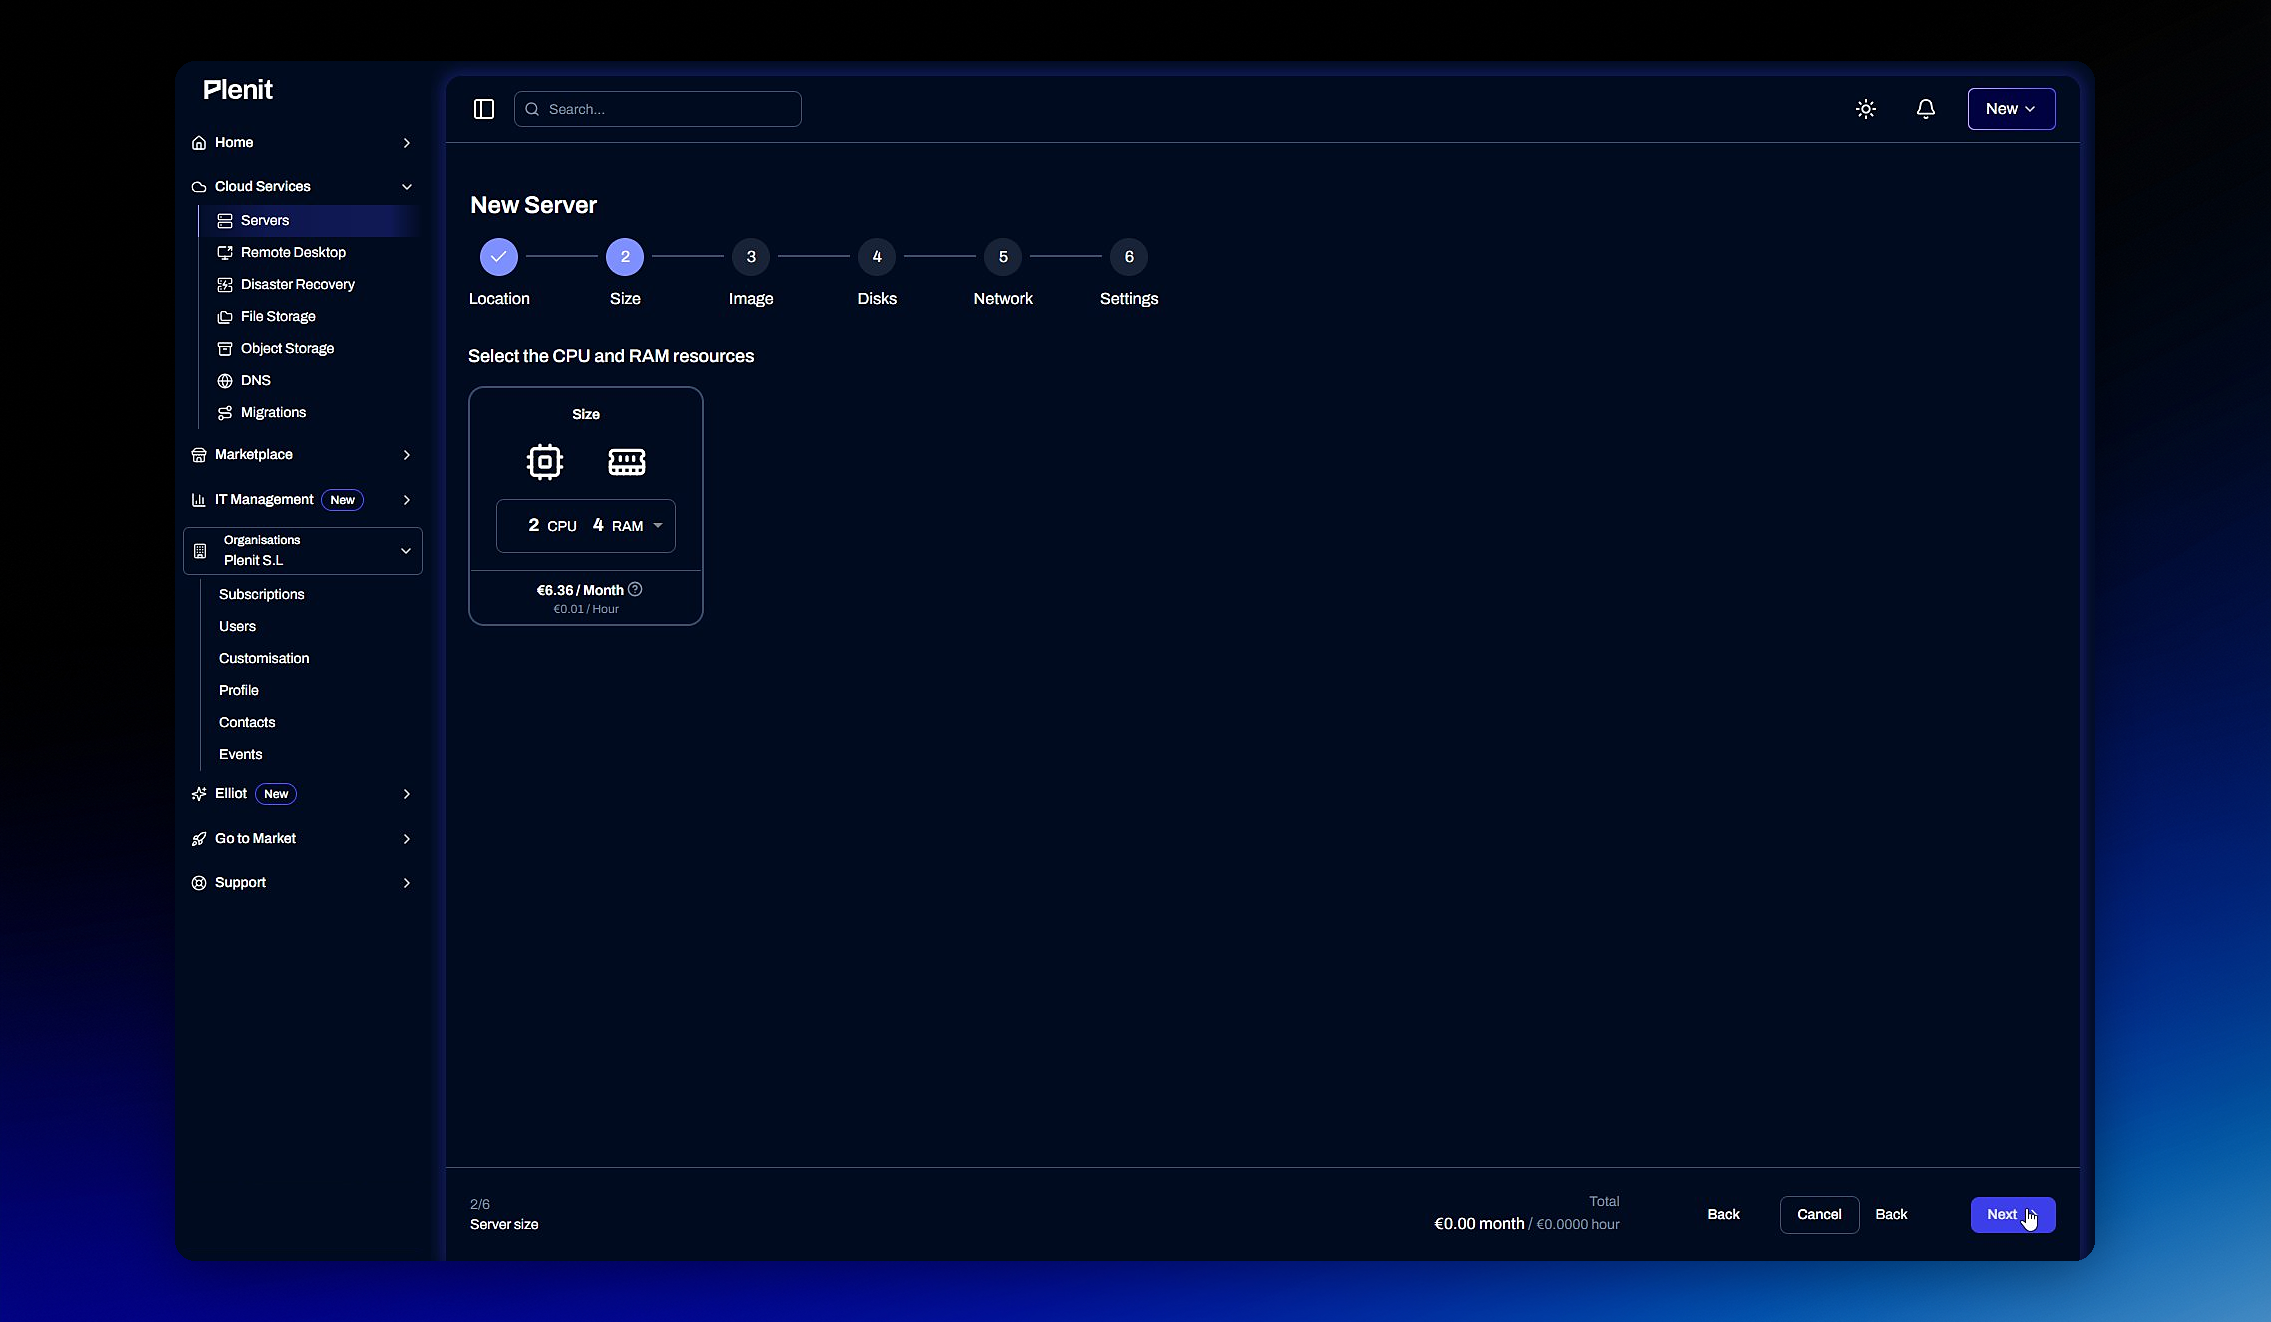
### 3. Define CPU and RAM
Now you choose the **compute resources**: how many CPUs and how much RAM the server will have. Adjust it to the workload you plan to put on it; you can always resize it later.
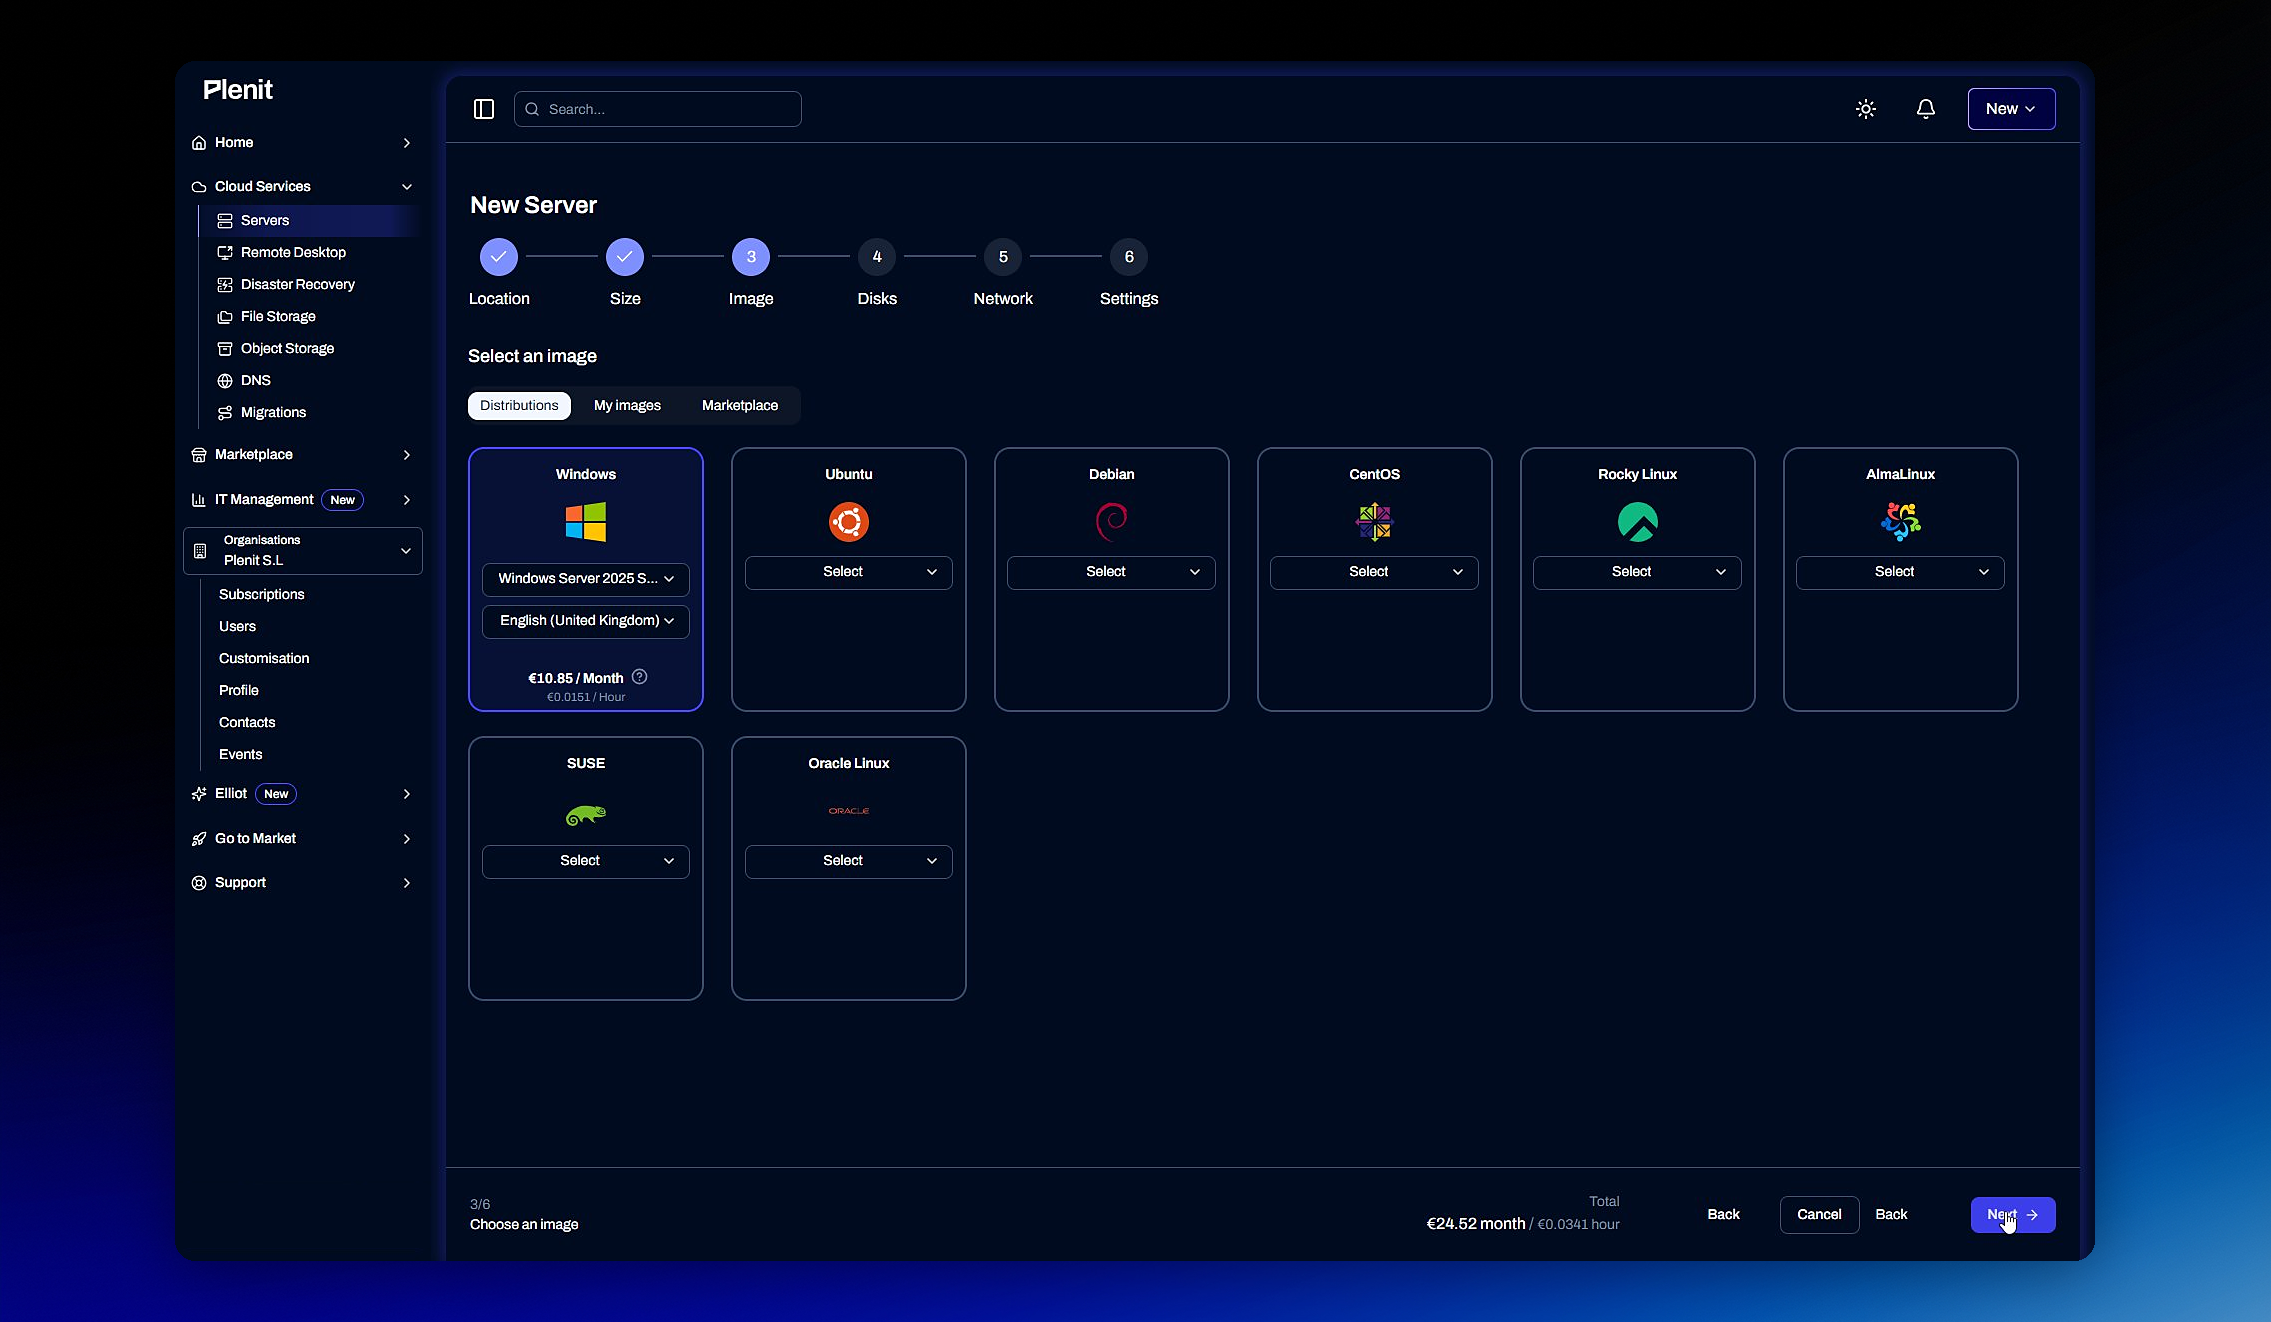
### 4. Select the image
Choose the **operating system** for the server. You can start from a ready-made image (for example, Windows) or switch between the tabs **My images** and **Marketplace** to use your own or one from the catalog.
### 5. Add applications (optional)
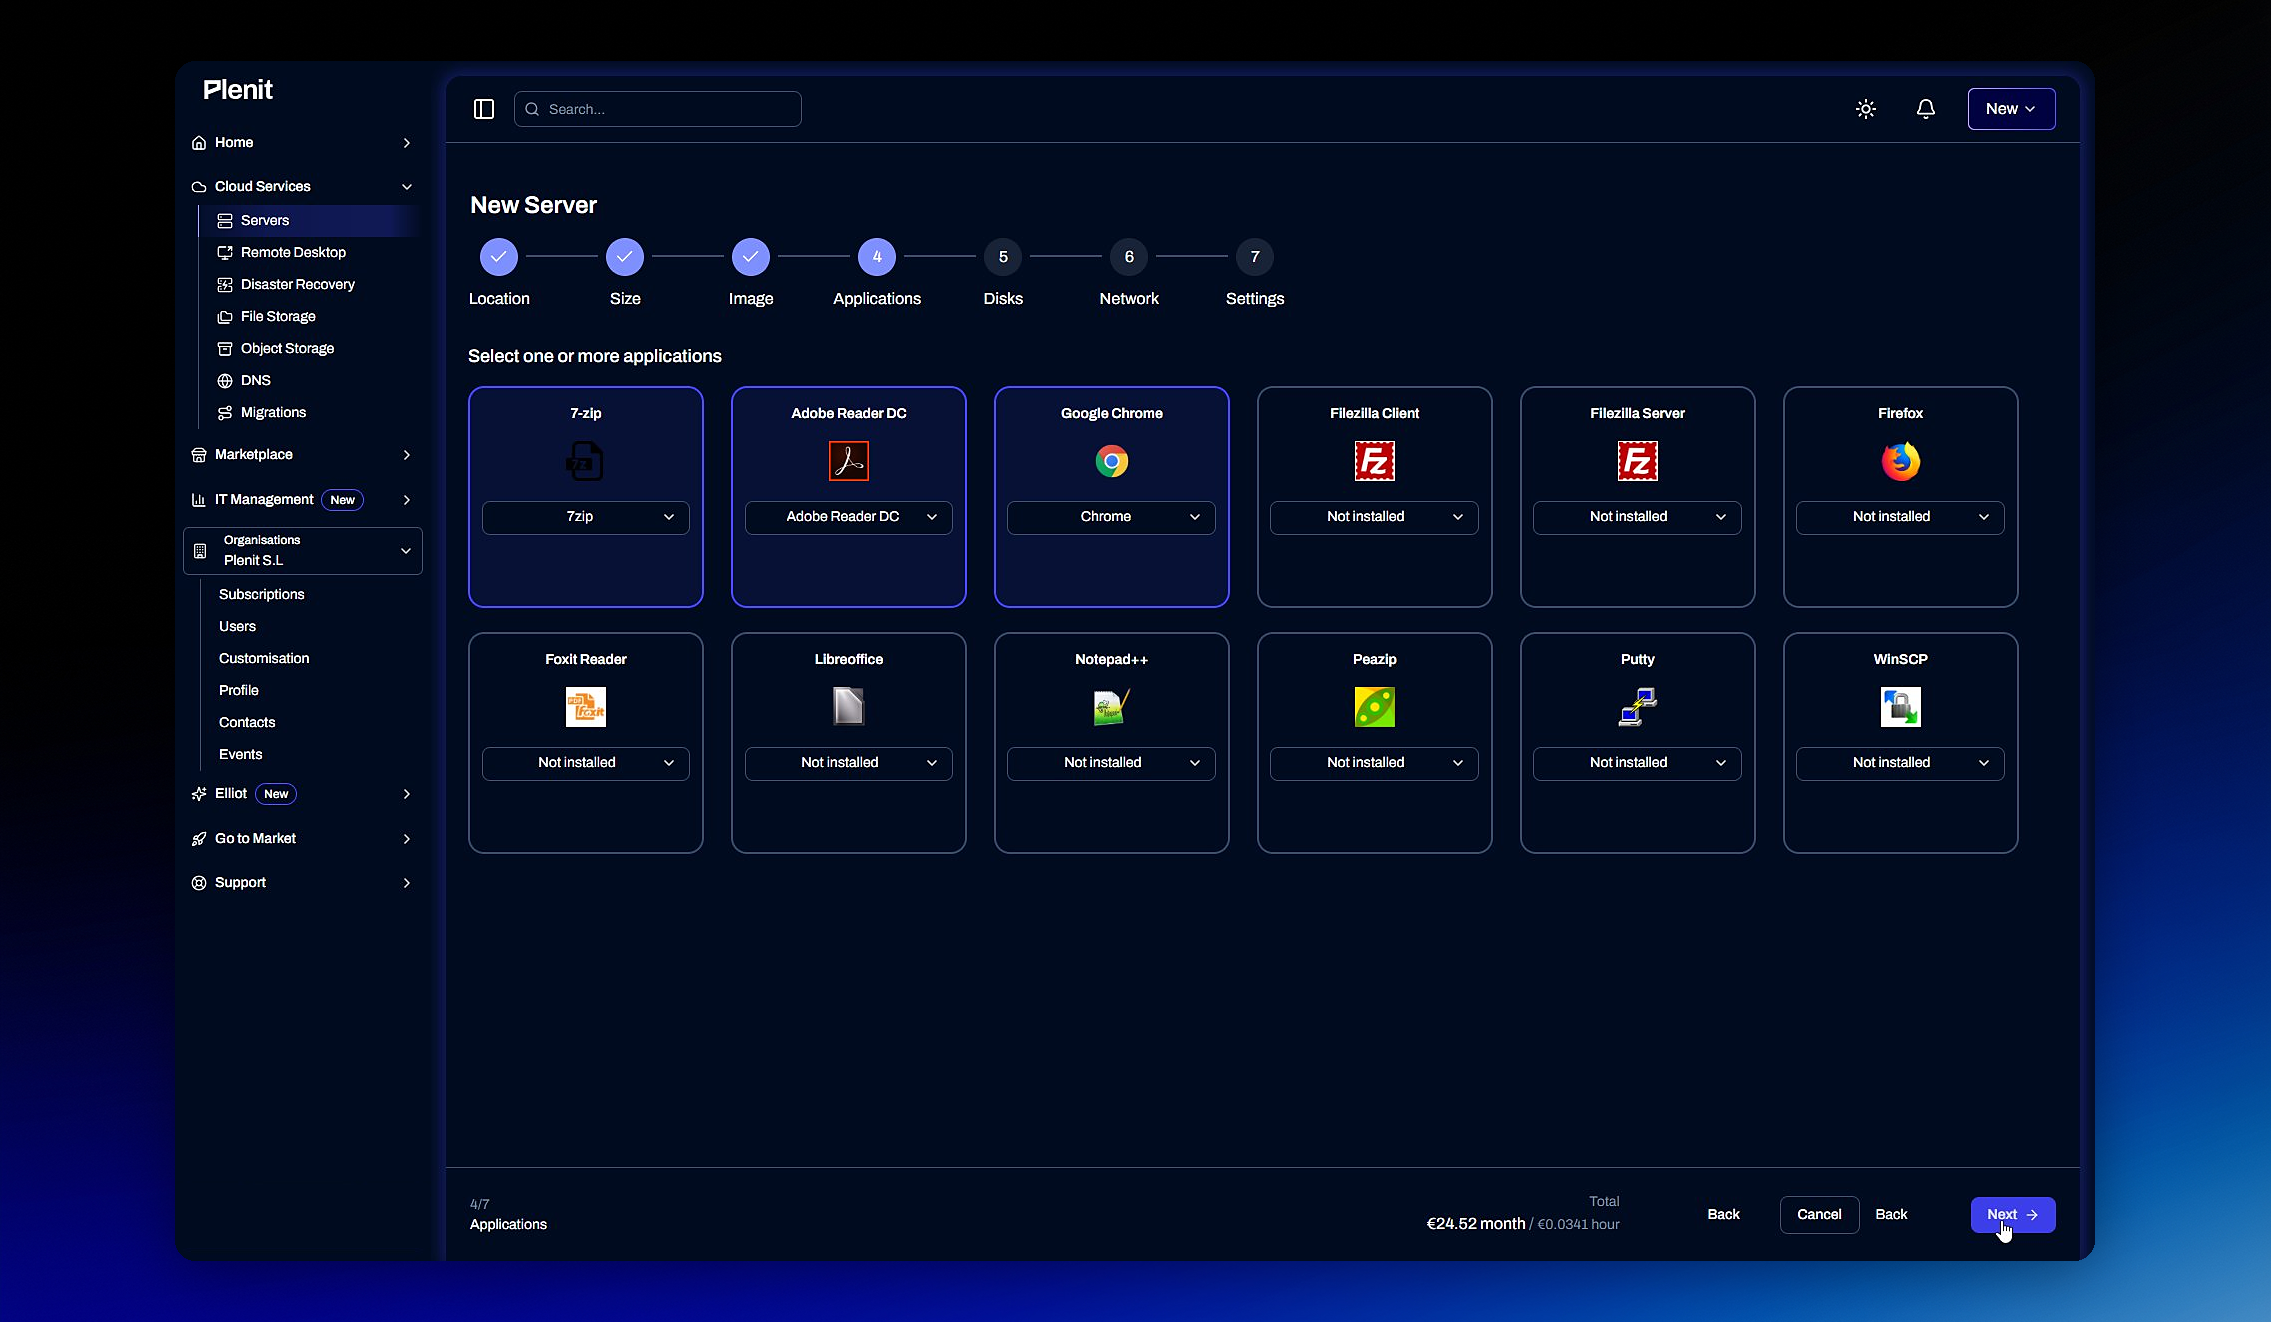
If you want, you can preinstall **applications** on the image, such as Google Chrome. It's optional: if you don't need any, continue.
### 6. Configure the disk
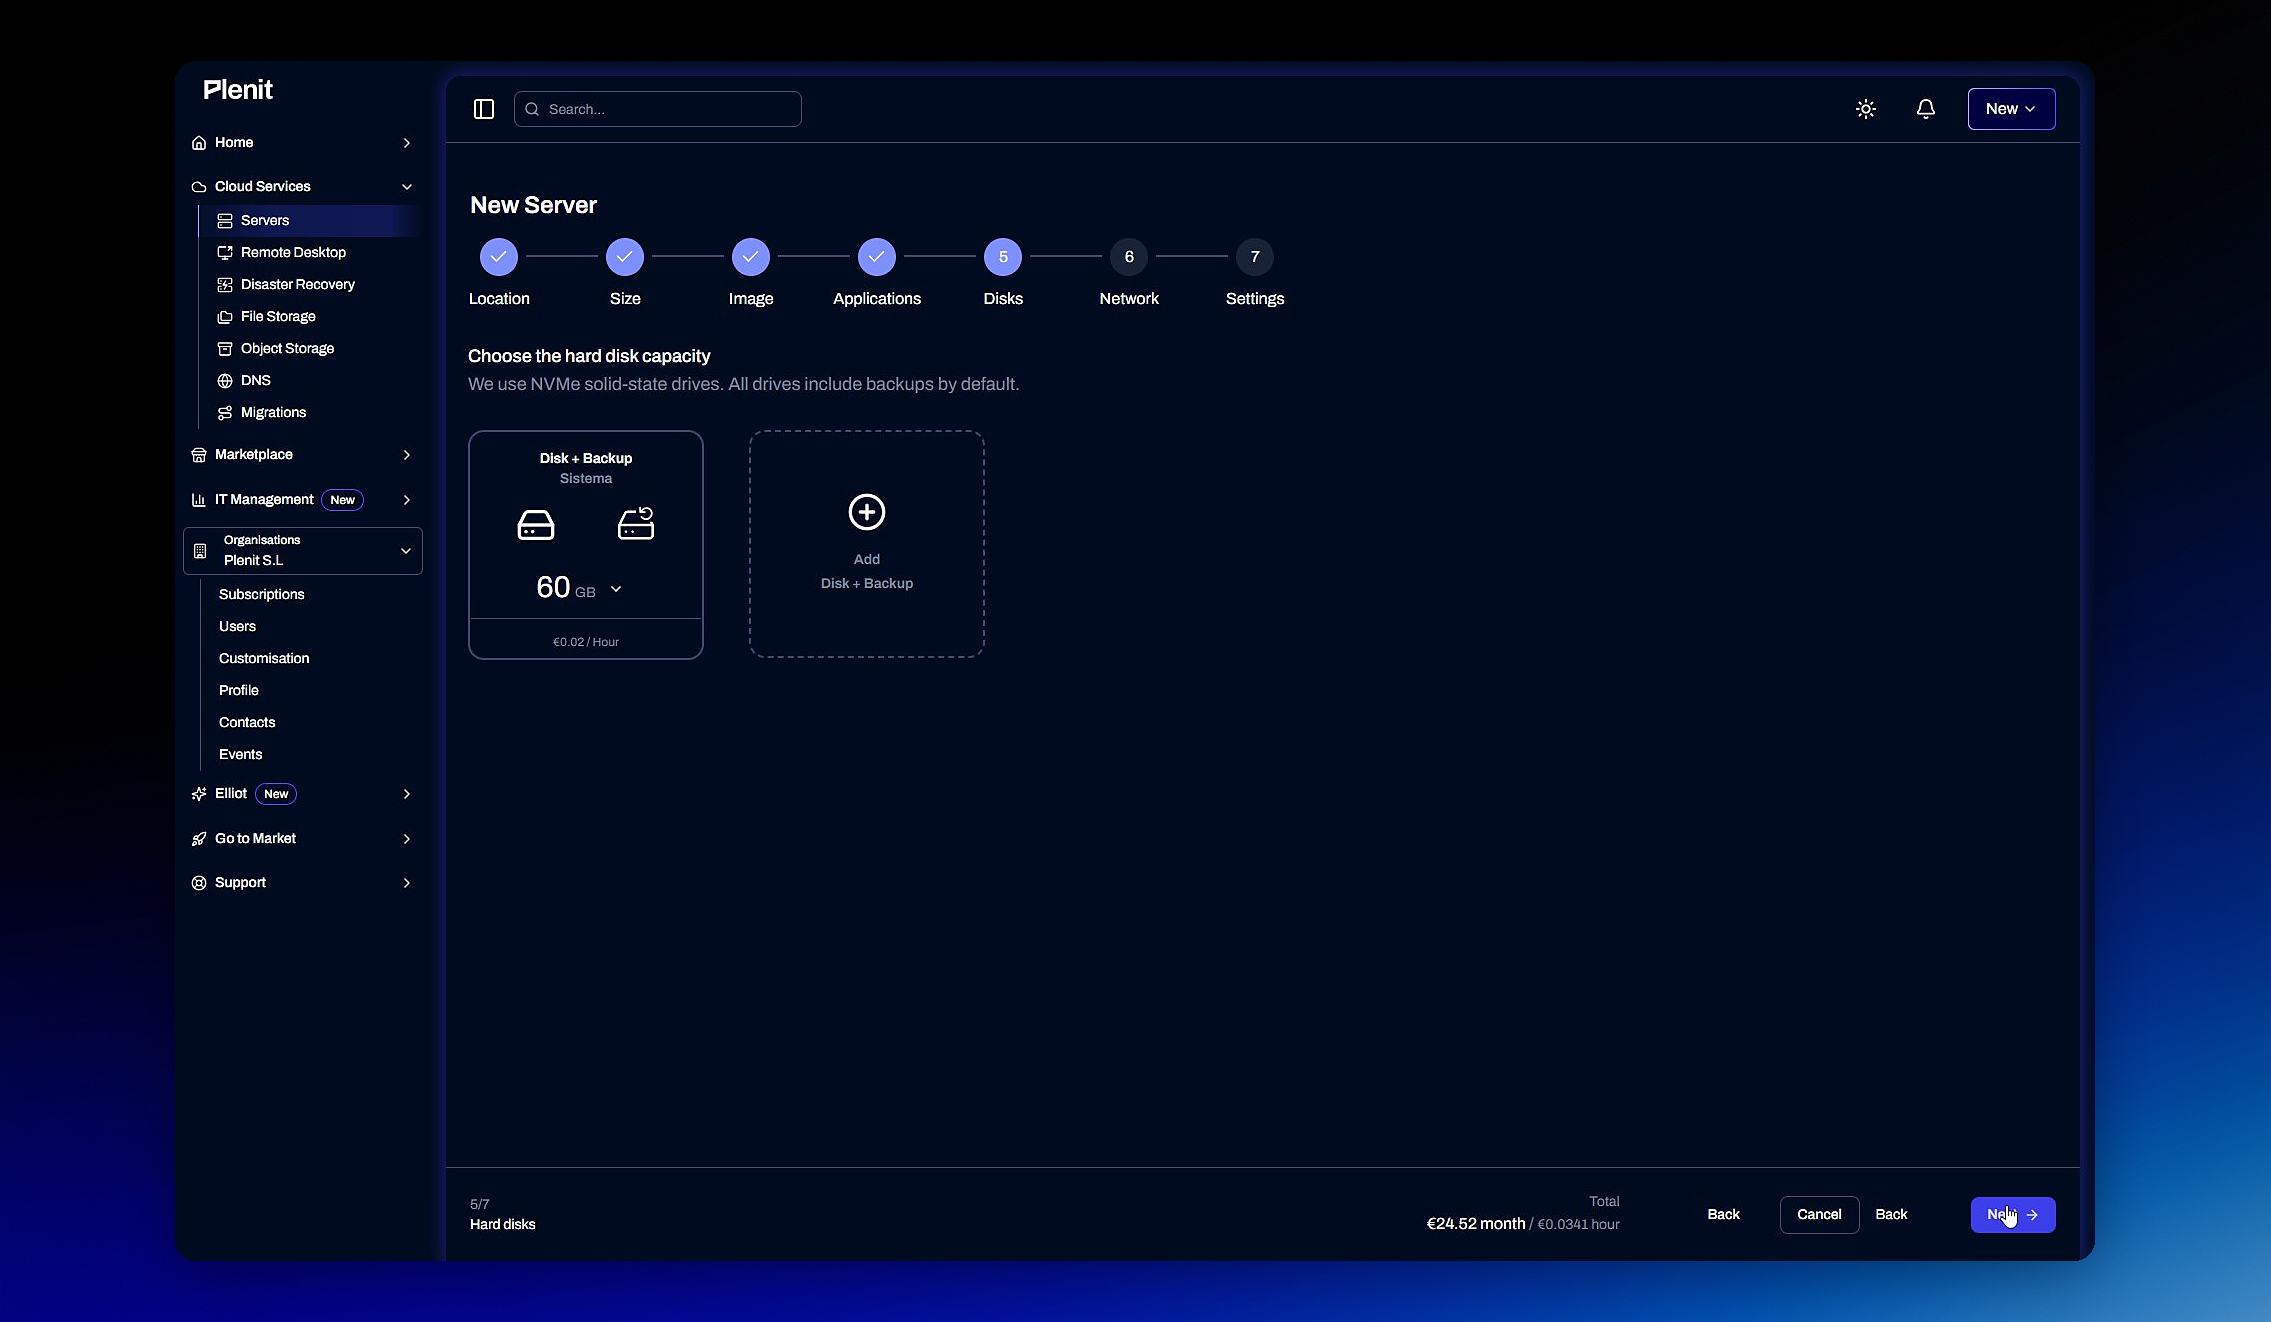
Define the **storage**: the disk size and, if needed, the associated backup.
> 👍 Recommendation
>
> Enabling backup from the start saves you headaches: it's your safety net for recovering data if something goes wrong.
### 7. Choose the network
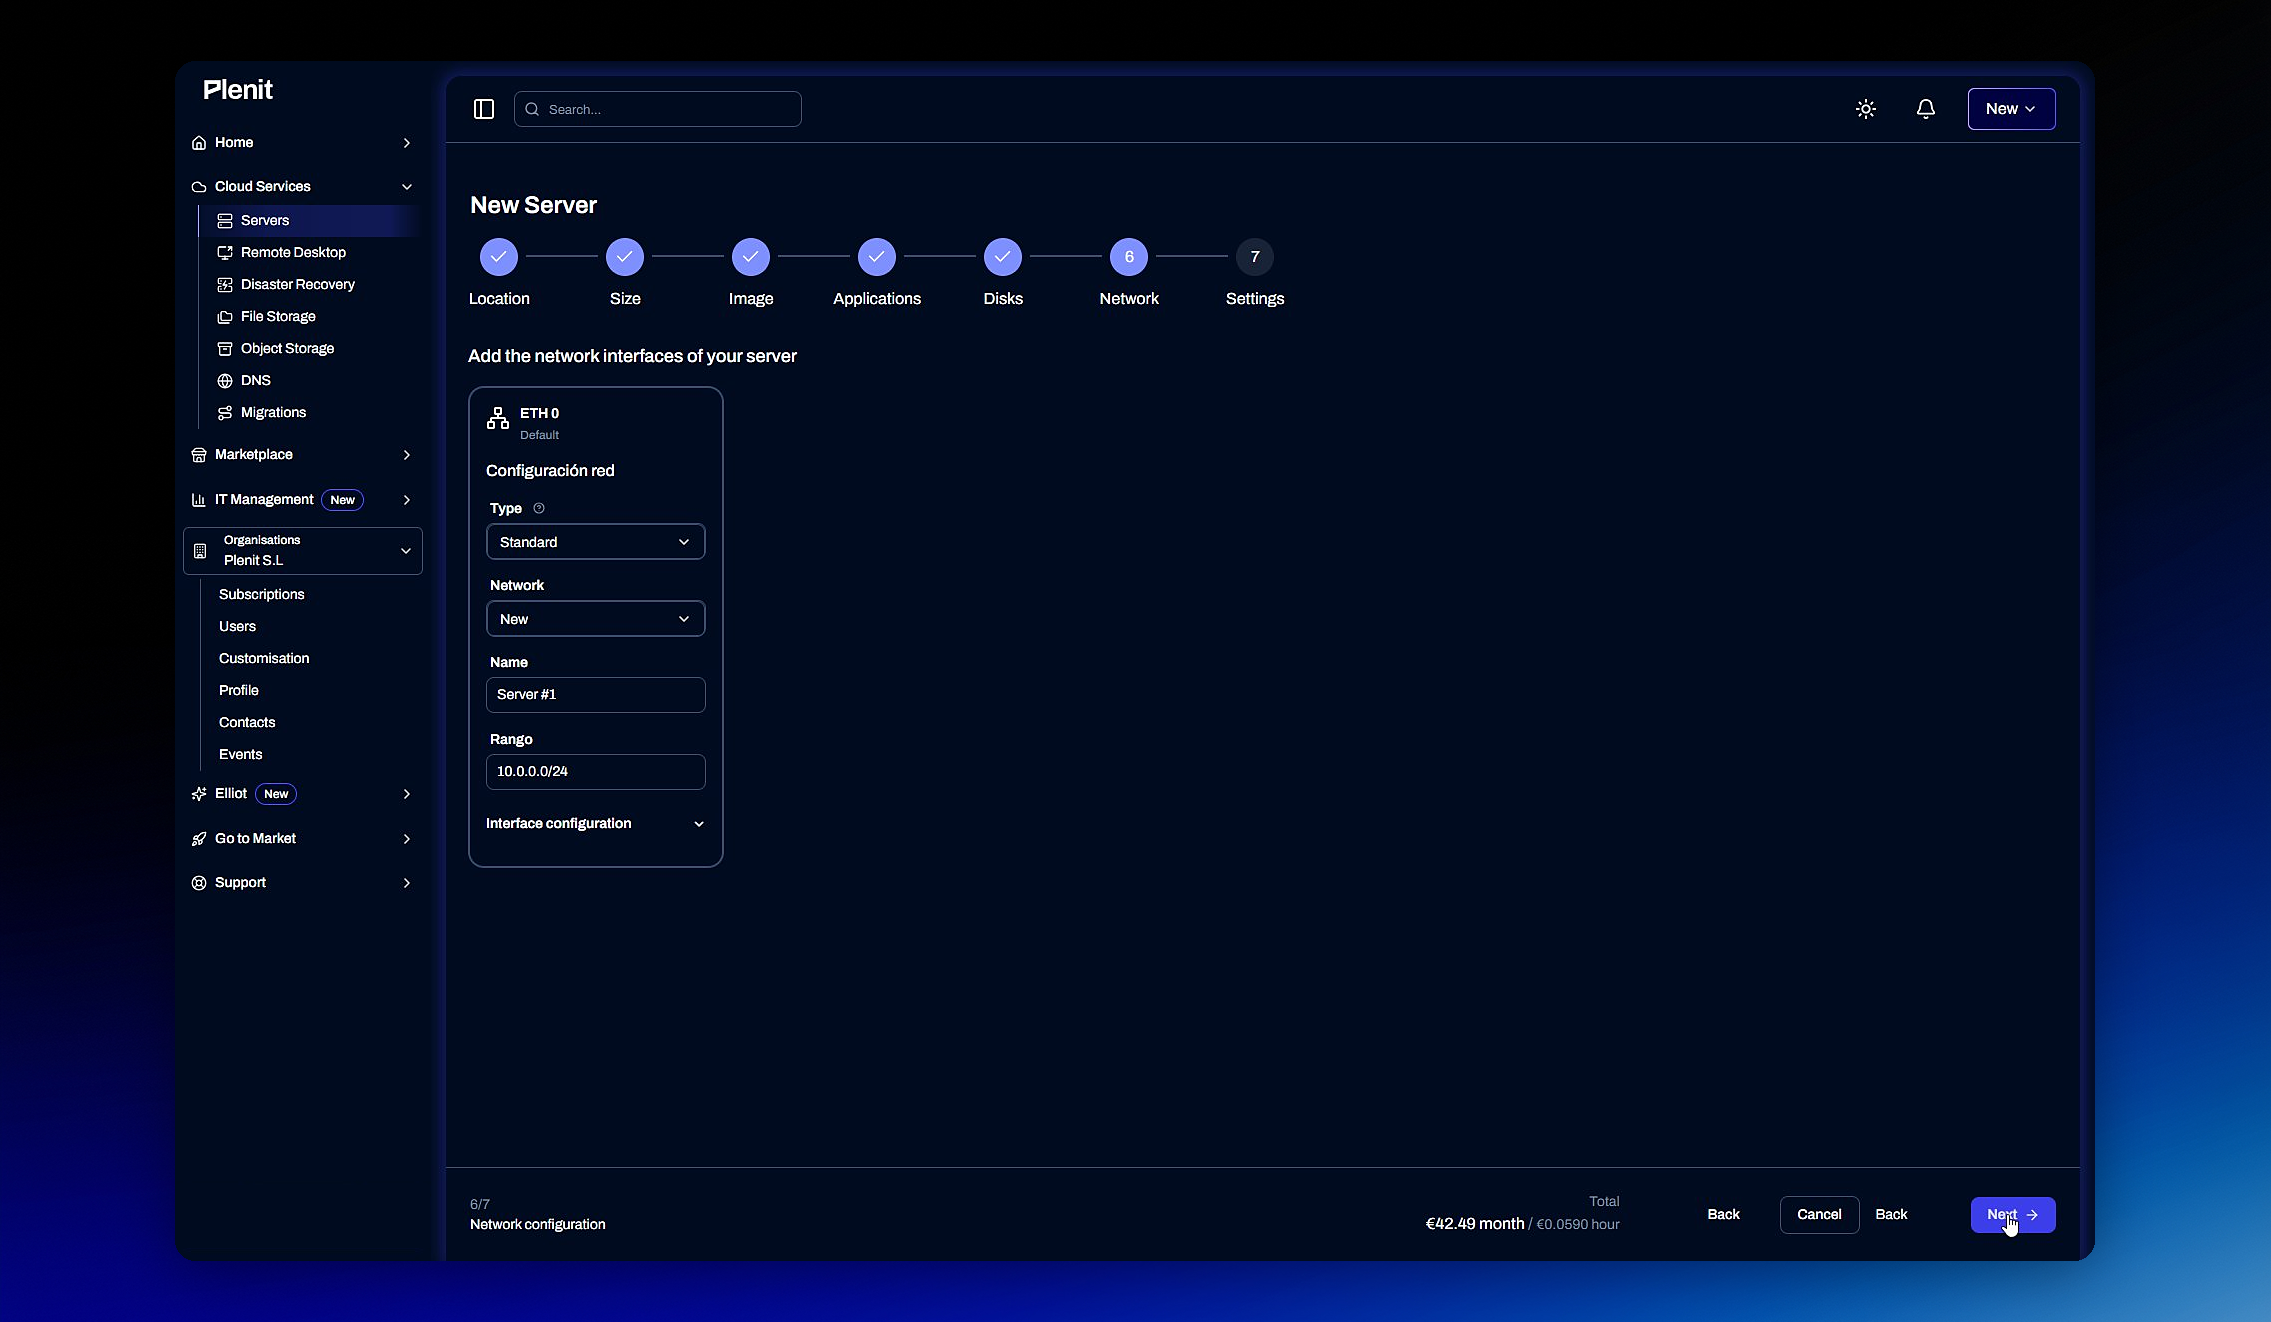
Select the **network type**. For most deployments, a **VPC** network gives you an isolated and controlled environment.
### 8. Final settings: name and access
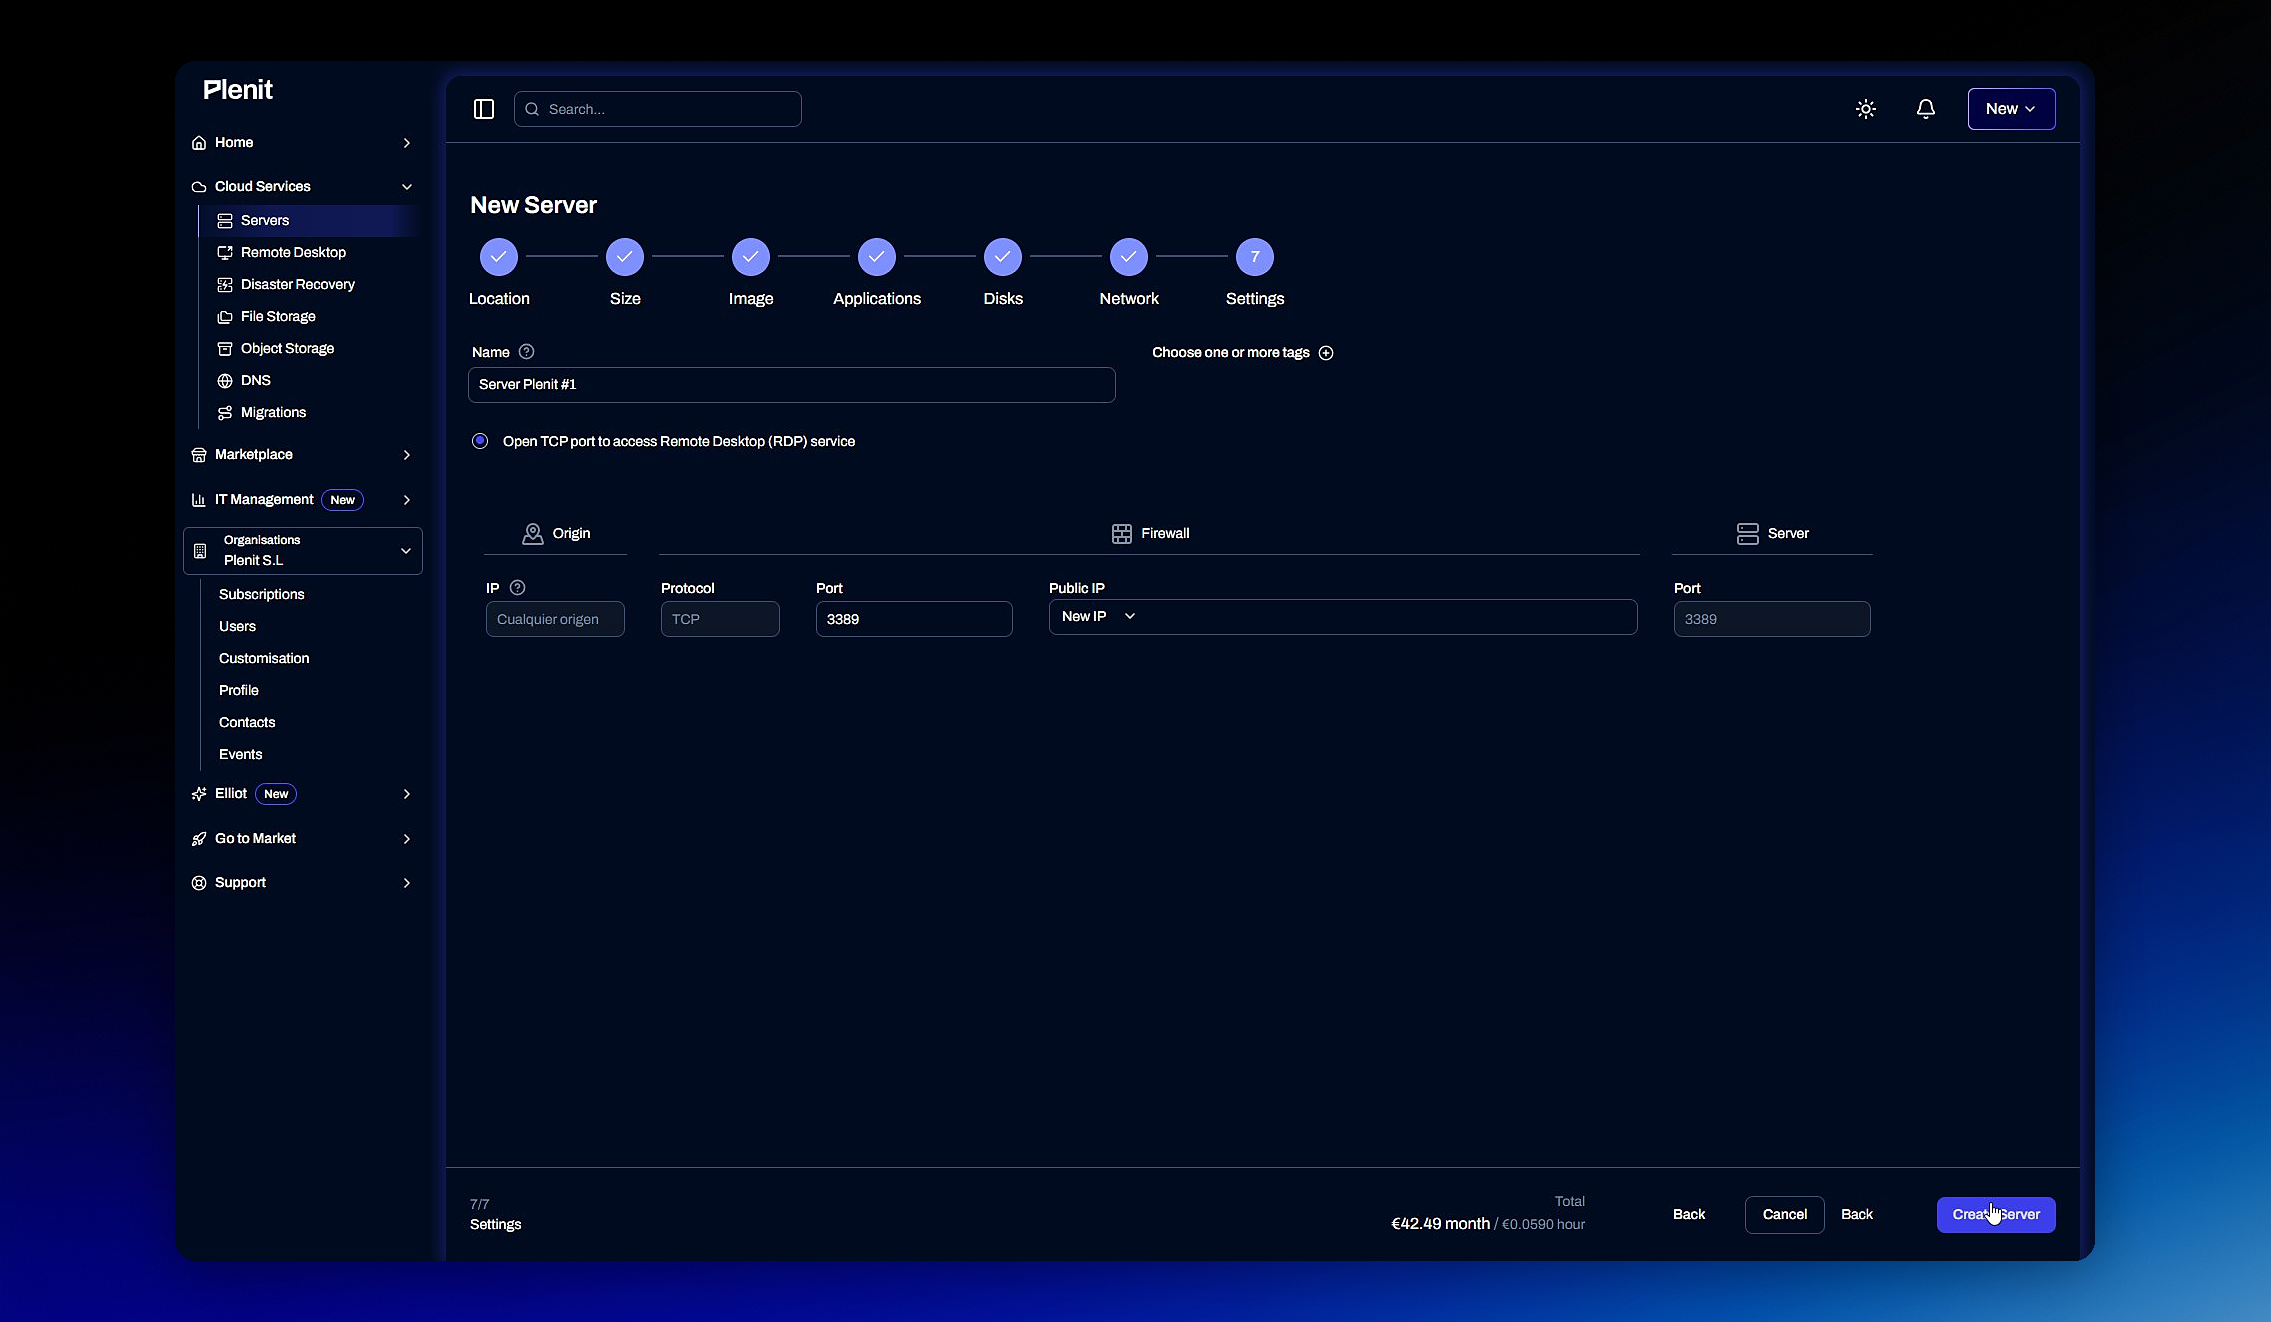
Final step of the wizard: give the **name** to the server and enable access via **RDP** if you're going to connect remotely.
### ~~9~~. Create the server
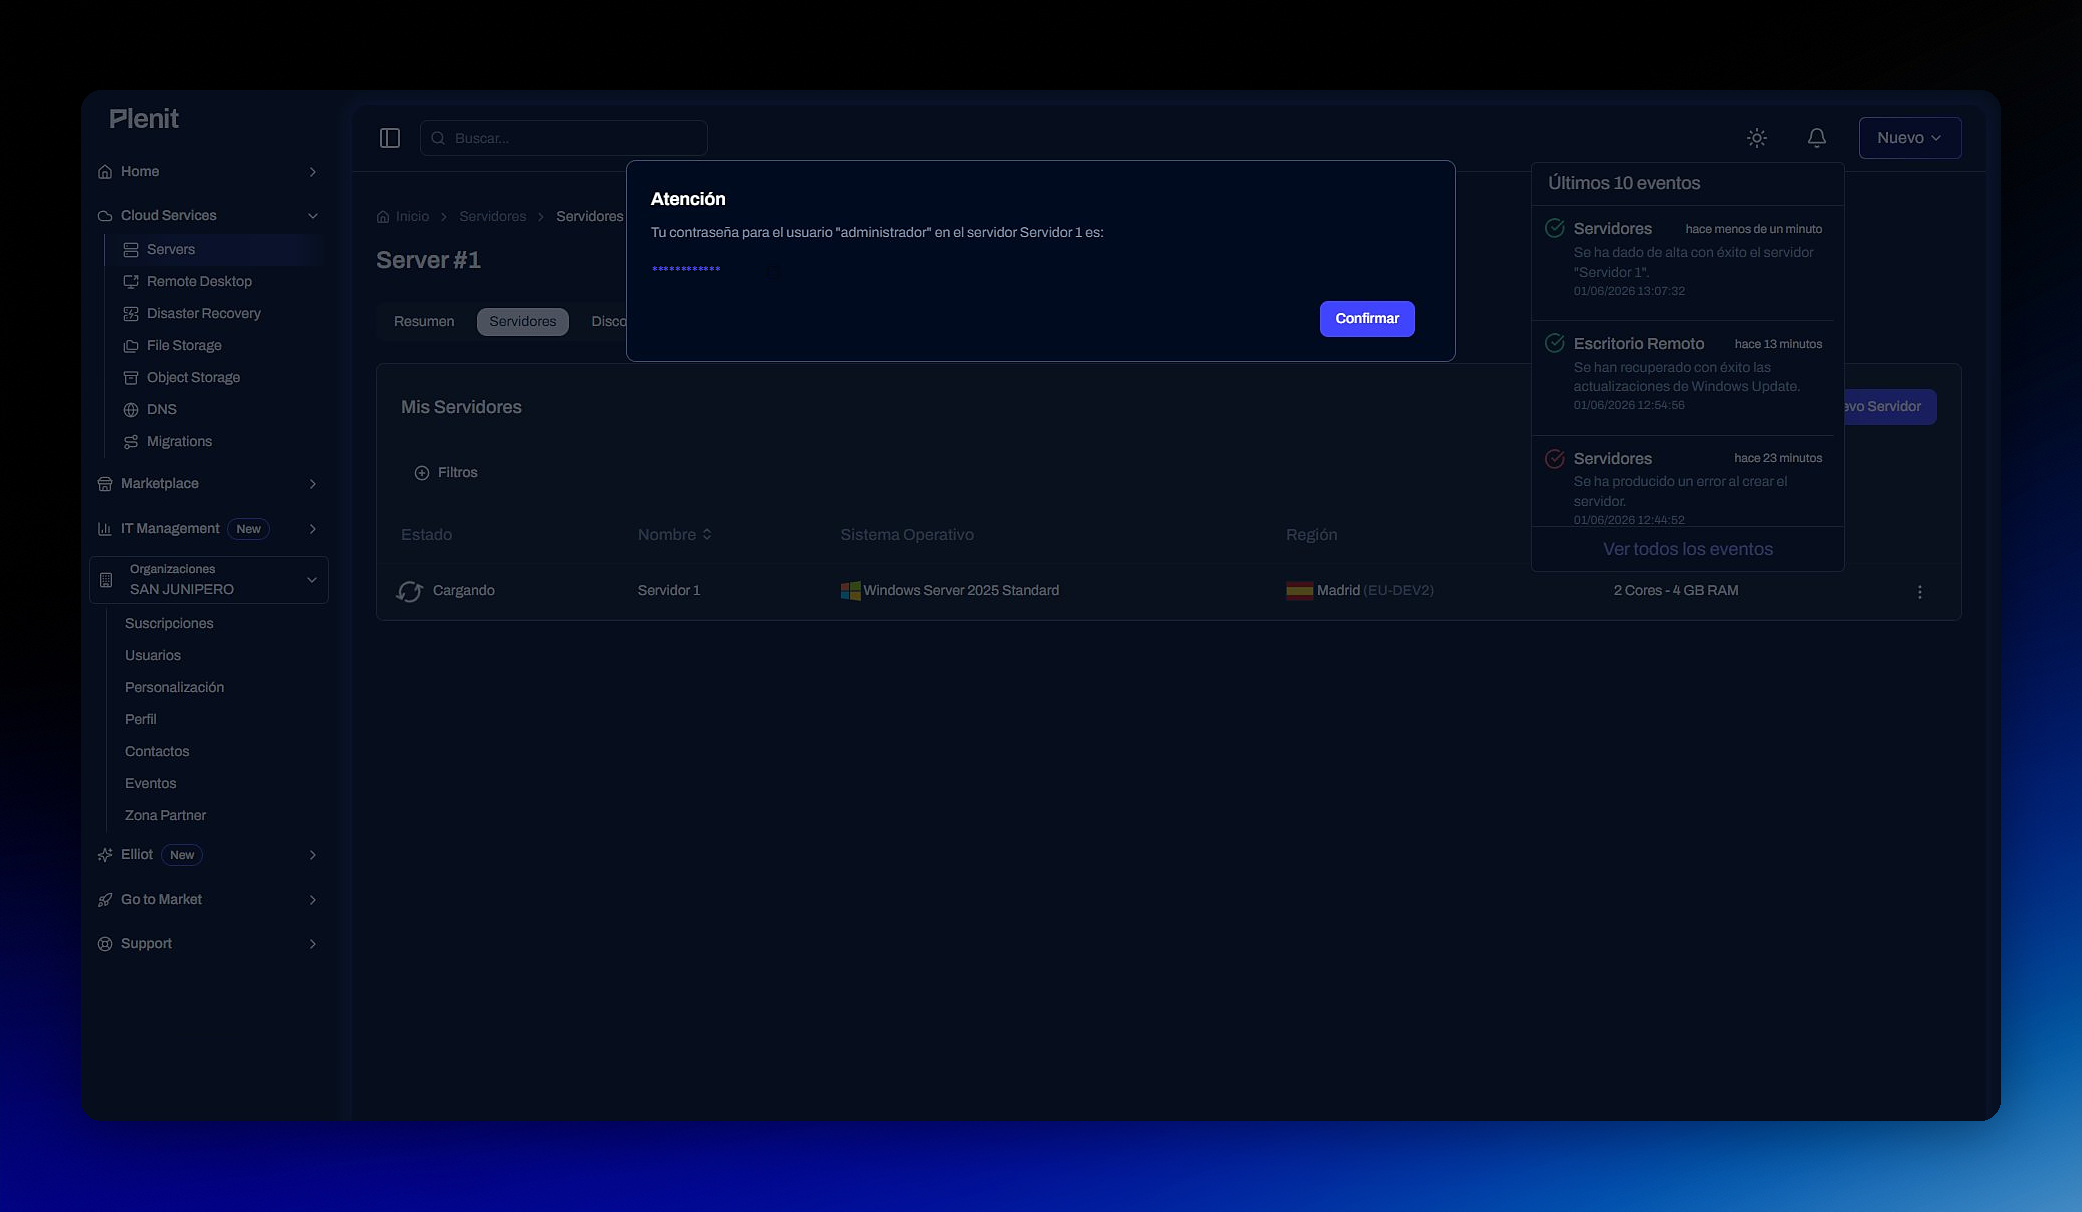
Confirm and create the server. We'll deploy it and show you a notice with the **temporary password** for access.
> #### ❗️ Save the password
>
> It's temporary and is only shown once.
>
> Copy it before closing the notice and change it on your first login.
### Check that everything is ready
Go back to **Servers**: your new server should already appear in the list with its status. When it's active, you can connect with the user and temporary password you just saved.
> #### 👍 Done
>
> You now have your first server deployed on Plenit.
>
> From here you can connect, install whatever you need, and start working.
Was this guide helpful? If you've gotten stuck at any step or something doesn't match what you see on screen, let us know from [**Tickets**](/docs-en/support/tickets.md) and we'll review it.
---
# Agent Instructions
This documentation is published with GitBook. GitBook is the documentation platform designed so that both humans and AI agents can read, navigate, and reason over technical content effectively. Learn more at gitbook.com.
## Querying This Documentation
If you need additional information that is not directly available in this page, you can query the documentation dynamically by asking a question.
Perform an HTTP GET request on the current page URL with the `ask` query parameter, and the optional `goal` query parameter:
```
GET https://docs.plenit.com/docs-en/productos/servers-1/quickstart.md?ask=&goal=
```
`ask` is the immediate question: it should be specific, self-contained, and written in natural language.
`goal` is optional and describes the broader end goal you are ultimately trying to accomplish on behalf of the user. GitBook uses it to tailor the answer towards what is most useful for that goal.
The response will contain a direct answer to the question and relevant excerpts and sources from the documentation.
Use this mechanism when the answer is not explicitly present in the current page, you need clarification or additional context, or you want to retrieve related documentation sections.