> For the complete documentation index, see [llms.txt](https://docs.plenit.com/llms.txt). Markdown versions of documentation pages are available by appending `.md` to page URLs; this page is available as [Markdown](https://docs.plenit.com/docs-en/platform/security/how-to-enable-2fa-for-access.md).
# Enable 2FA for Access
Enable two-step verification for the Administration Panel and, if needed, for the User Portal from the user profile on the platform.
Two-step verification adds a second access factor: after entering the password, you must validate the login with a code generated in an authenticator app, such as **Google Authenticator** or **Microsoft Authenticator**.
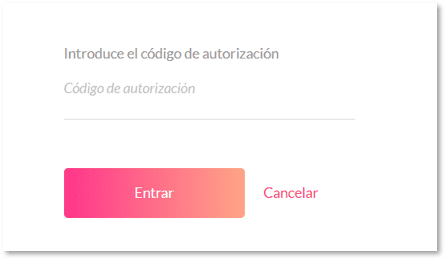
### Before you start
Follow these steps before enabling two-step verification:
* Log in to the [Platform](https://admin.jotelulu.com/) with an already registered user.
* Install on your *smartphone* an authenticator app, such as **Google Authenticator** or **Microsoft Authenticator**.
* If you also want to enable protection in the **User Portal**, first deploy a service that uses that portal, such as **Remote Desktop** or **File Storage**.
### Audience and scope
This guide is intended for administrators who manage users within the platform. The procedure covers enabling the second factor for the **Administration Panel** and, optionally, for the **User Portal**.
### Step 1. Open the user's profile
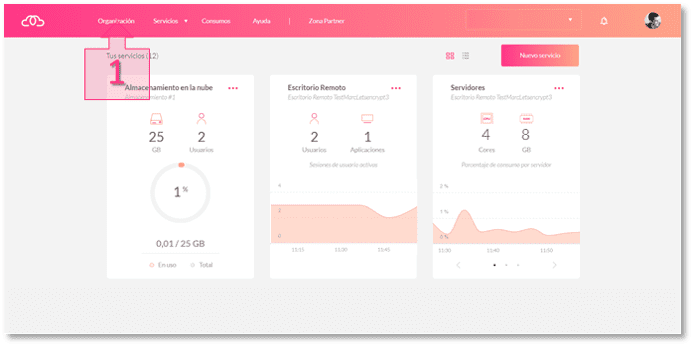
1. In the *Dashboard* initial, open the section **Organization** (1) from the top menu.
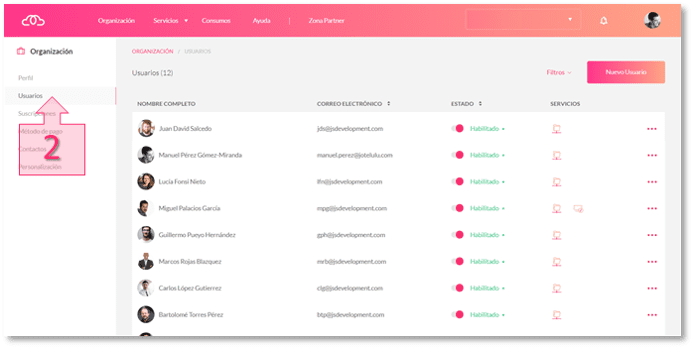
2. In the left side menu, go to **Users** (2).
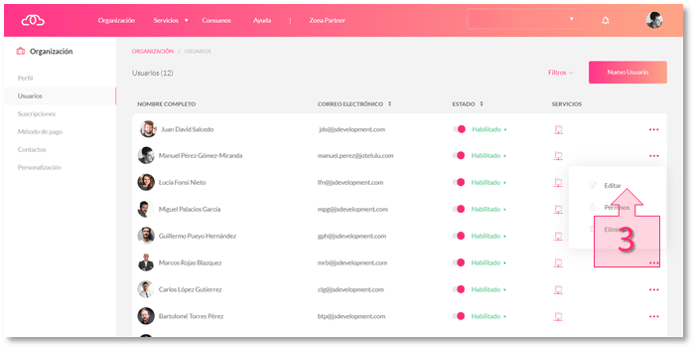
3. Locate the user you want to modify, open the context menu **"..."** and select **Edit** (3).
### Step 2. Enable two-step verification
1. Within the user's record, go to the subsection **Profile**.
2. Scroll down to the part where the password and two-factor authentication are managed.
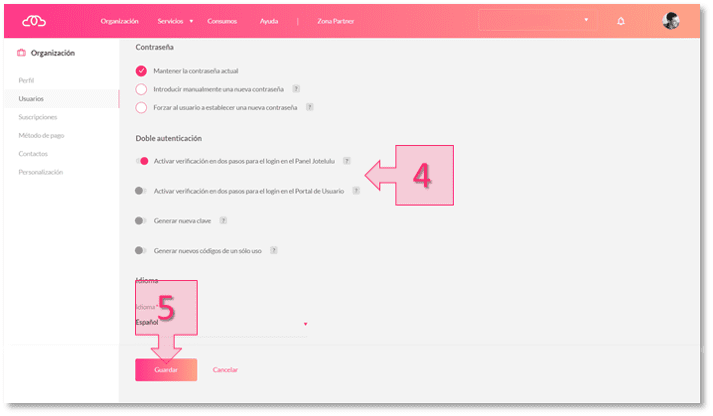
3. Enable the *checkbox* of **two-factor authentication** (4) for the **Administration Panel**.
4. Save the changes (5).
When you save, the platform will display a confirmation indicating that the change has been applied successfully.
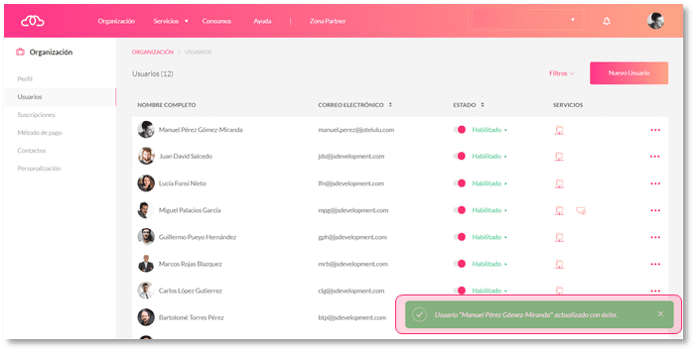 authentication allows you to increase security in the processes of
### Step 3. Register the authenticator app
The next time the user logs in, they must have open on their *smartphone* the app **Google Authenticator** or **Microsoft Authenticator**. When they access it, the platform will display a modal window with the data needed to link the account.
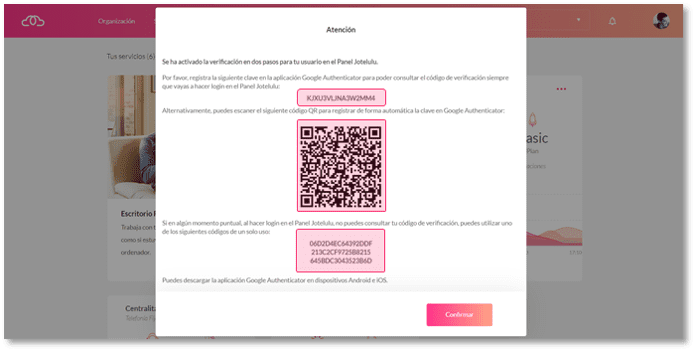
You can complete the registration in one of these two ways:
1. **Alphanumeric key** (6.1). Enter the key manually in the authenticator app.
2. **QR code** (6.2). Scan the QR code from the authenticator app.
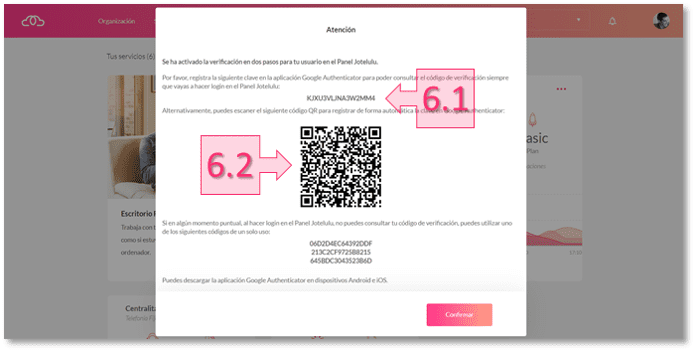
After registration, the app will start generating verification codes. From that moment on, the user must consult that code every time they want to access the platform.
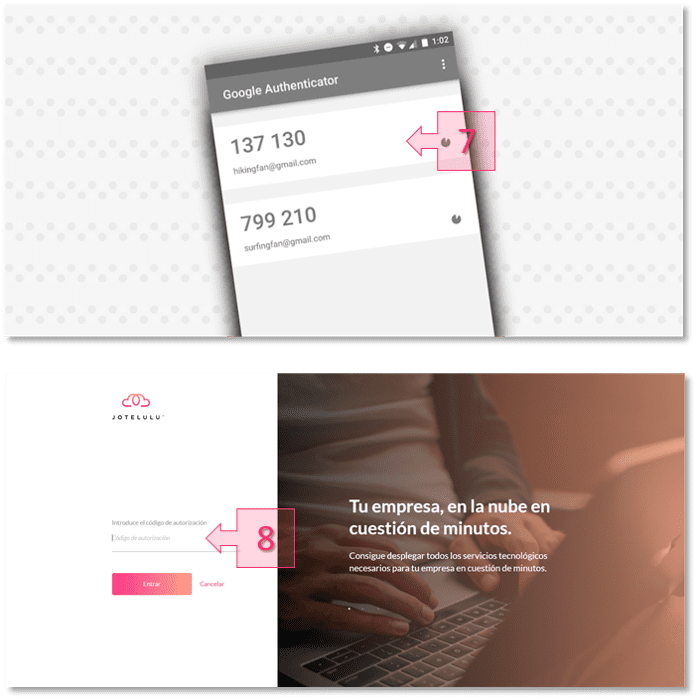
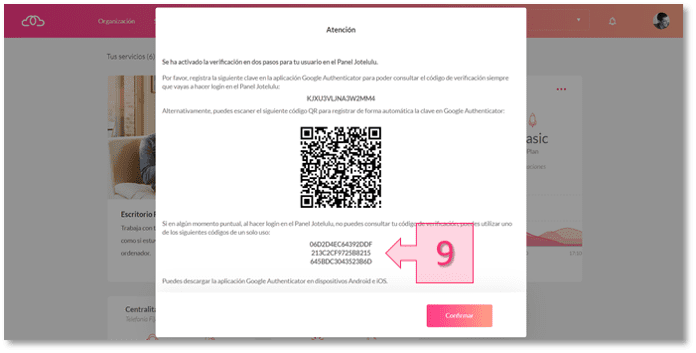
The platform also generates **one-time access codes** (9). These codes are single-use and serve as a backup if you cannot consult the mobile app at a given moment.
### What changes after enabling two-factor
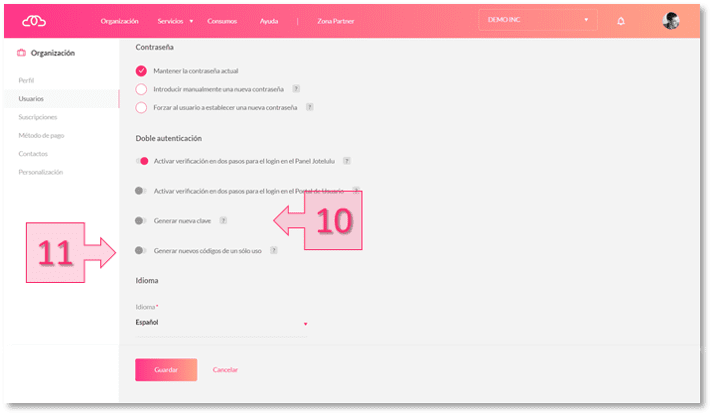
Once activation is complete, two additional actions are enabled in the user's profile:
* **Generate new key** (10) to link the authenticator app again.
* **Generate new one-time codes** (11) to have new backup codes.
The behavior is the same whether you use **Google Authenticator** or whether you use **Microsoft Authenticator**.
### Security and scope
This configuration adds an additional layer of protection to access because it combines **something you know** (the password) with **something you have** (the authenticator app on your mobile phone or a one-time code). If you want to expand the information about security in Plenit, see the section on [Infrastructure and Security](https://jotelulu.com/infraestructura-seguridad/).
---
# Agent Instructions
This documentation is published with GitBook. GitBook is the documentation platform designed so that both humans and AI agents can read, navigate, and reason over technical content effectively. Learn more at gitbook.com.
## Querying This Documentation
If you need additional information that is not directly available in this page, you can query the documentation dynamically by asking a question.
Perform an HTTP GET request on the current page URL with the `ask` query parameter, and the optional `goal` query parameter:
```
GET https://docs.plenit.com/docs-en/platform/security/how-to-enable-2fa-for-access.md?ask=&goal=
```
`ask` is the immediate question: it should be specific, self-contained, and written in natural language.
`goal` is optional and describes the broader end goal you are ultimately trying to accomplish on behalf of the user. GitBook uses it to tailor the answer towards what is most useful for that goal.
The response will contain a direct answer to the question and relevant excerpts and sources from the documentation.
Use this mechanism when the answer is not explicitly present in the current page, you need clarification or additional context, or you want to retrieve related documentation sections.